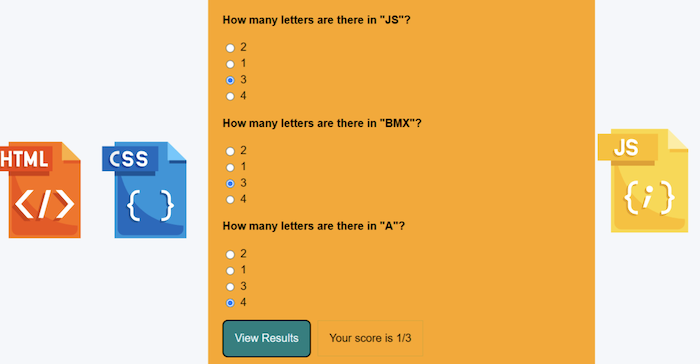
Ever thought about crafting a quiz that hooks your audience from the get-go? Imagine blending HTML, CSS, and JavaScript to build a fun and educational interactive experience. This guide will walk you through creating your quiz application step by step. Dive in now, and let’s learn how to make a quiz in HTML, CSS, and JavaScript and make learning a captivating adventure!
Start by structuring your quiz with HTML, styling it for a great user experience with CSS, and adding interactivity and logic using JavaScript to manage questions, answers, and scores.
Keep reading through the article to build your quiz web app using HTML, CSS, and JavaScript.
HTML Structure for the Quiz
Creating a quiz starts with the proper HTML quiz structure. It’s like setting up the skeleton of your quiz. Here’s how you do it in simple steps.
Quiz Container
First, you need a <div> to hold your entire quiz. This is your quiz container.
<div id="quiz-container"></div>
Question and Options
Inside your container, add sections for your questions and options. Use <p> for each option and <button> for the question.
<div id="quiz-container"> <p id="question"></p> <div id="options"></div> </div>
Results Display
Don’t forget a place to show the results. Another <div> works perfectly.
<div id="results"></div>
By following these steps, you’ve laid the groundwork for your quiz. Next up, we’ll bring it to life with CSS and JavaScript!
How to Add Styles to the Quiz with CSS
Now that your HTML is in place, it’s time to make it shine with CSS quiz styling. Here’s how to make your quiz look inviting and professional.
Basic Styling
Start with the basics. Give your quiz container a distinct look.
#quiz-container {

background-color: #f9f9f9;

border: 1px solid #ddd;

padding: 20px;

width: 80%;

max-width: 600px;

margin: auto;

}
Question and Options
Style your question to stand out. Make your options (buttons) interactive and engaging.
#question {

font-size: 20px;

margin-bottom: 10px;

}

button {

background-color: #007bff;

color: white;

border: none;

padding: 10px 20px;

margin: 5px;

cursor: pointer;

}

button:hover {

opacity: 0.8;

}
Results Display
Ensure the results section is noticeable and provides immediate feedback.
#results {

font-size: 18px;

font-weight: bold;

color: #333;

margin-top: 20px;

}
Responsive Design
Don’t forget to make your quiz accessible on all devices. Use media queries to adjust layouts for smaller screens.

@media (max-width: 600px) {

#quiz-container {

width: 100%;

padding: 10px;

}

}
With these styling tips, your quiz is functional and visually attractive. Next, we’ll dive into adding interactivity with JavaScript!
Add Interactivity with JavaScript to Quiz
JavaScript quiz logic is crucial in transforming your static quiz into an interactive experience. Let’s break down the essentials.
Initialize Your Quiz
Start by defining your quiz questions, choices, and correct answers in an array.
const quizQuestions = [ {

question: "What is 2+2?",

choices: ["2", "4", "22"],

correctAnswer: "4"

}, // Add more questions here ];
Display Questions and Choices
Create a function to display the current question and choices. Loop through your options and add them as buttons.
function showQuestion(questionIndex) {

const questionElement = document.getElementById("question");

questionElement.innerText = quizQuestions[questionIndex].question;

const optionsElement = document.getElementById("options");

optionsElement.innerHTML = "";

quizQuestions[questionIndex].choices.forEach(function(choice, index) {

const button = document.createElement("button");

button.innerText = choice; button.addEventListener("click", function() {

selectAnswer(choice, questionIndex);

});

optionsElement.appendChild(button);

});

}
Handle Answer Selection
Implement logic to check if the selected answer is correct and move to the next question or show results.
function selectAnswer(answer, questionIndex) {

if (answer === quizQuestions[questionIndex].correctAnswer) {

// Increment score or move to next question} // Display next question or show results

 }
Shuffle Questions
Shuffle the questions each time the quiz starts to keep the quiz engaging.
function shuffleQuestions() {

quizQuestions.sort(() => Math.random() - 0.5);

}
Displaying Results and Retry Feature
At the end, show the user their score and provide an option to retry the quiz.
function showResults() {

// Calculate and display score

const retryButton = document.createElement("button");

retryButton.innerText = "Retry";

retryButton.addEventListener("click", function() {

startQuiz(); });

// Append retryButton to your results container

}
This approach keeps users engaged and provides immediate feedback, which is crucial for an effective learning experience. Implementing these JavaScript techniques makes your quiz a powerful interactive tool that enhances user engagement and learning outcomes.
Advanced Features for Quiz Applications
Elevate your quiz application with advanced features that challenge users and make your quiz stand out.
Timers for Each Question
Introduce a sense of urgency and keep the pace lively with timers.
let timer; function startTimer(duration, display) {

let timer = duration, minutes, seconds;

setInterval(function () {

minutes = parseInt(timer / 60, 10);

seconds = parseInt(timer % 60, 10);

minutes = minutes < 10 ? "0" + minutes :

minutes; seconds = seconds < 10 ? "0" + seconds : seconds;

display.textContent = minutes + ":" + seconds; if(--timer < 0) {

timer = duration; // Move to next question or end quiz

}

 },

1000); }
Question Randomization
Mix up questions to prevent memorization and keep quizzes unpredictable.
function shuffleQuestions(questions) {

for (let i = questions.length - 1; i > 0; i--) {

const j = Math.floor(Math.random() * (i + 1));

[questions[i], questions[j]] = [questions[j], questions[i]]; }

return questions;

}
Immediate Feedback Mechanism
Offer feedback as soon as an answer is selected to reinforce learning or correct misunderstandings.
function provideFeedback(selectedOption, correctAnswer) {

if (selectedOption === correctAnswer) {

alert("Correct!"); } else {

alert("Wrong answer. The correct answer was " + correctAnswer);

}

}
Integration of External APIs
Expand your quiz by fetching questions from external APIs for a dynamic and ever-changing quiz experience.
async function fetchQuestions() {

const response = awaitfetch('https://api.example.com/questions');

const questions = await response.json(); // Process and display questions

}
How to Debug and Test and Test Quiz
Making sure your quiz application runs flawlessly is crucial. Here’s how to tackle debugging and testing effectively.
Start with Console Logs
Use console.log() to track values and flow of execution. It’s a simple yet powerful way to see what’s happening in your code.
console.log("Current Question Index: ", currentQuestionIndex);
Use Breakpoints
In your browser’s developer tools, set breakpoints to pause execution. This lets you inspect variables and understand the code’s state at specific moments.
Test User Interactions
Manually test all possible user interactions. Click every button, answer questions correctly and incorrectly, and retry the quiz. Ensure everything behaves as expected.
Responsive Design Testing
Check your quiz on various devices and screen sizes. Tools like Chrome DevTools’ device mode can simulate different screens, helping ensure your quiz looks excellent everywhere.
JavaScript Testing Frameworks
Consider using JavaScript testing frameworks like Jest or Mocha for more complex quizzes. These tools allow you to write tests that automatically check your quiz’s logic and functionality.
How to Handle Errors Gracefully?
Ensure your quiz handles errors without crashing. Use try-catch blocks to manage exceptions, especially when dealing with external APIs.
try {

// Attempt to fetch questions

}

catch (error) {

console.error("Failed to fetch questions: ", error);

}
Performance Testing
Your quiz should load and respond quickly. Use tools like Google’s PageSpeed Insights to identify and fix performance bottlenecks.
Why Debugging and Testing Matter
Thorough debugging and testing ensure your quiz is reliable and user-friendly. It’s about creating a smooth experience that keeps users engaged without frustration. Remember, a well-tested quiz reflects your commitment to quality and enhances the learning journey for your users.
How to Deploy Your Quiz
Once your quiz is polished and ready, it’s time to share it with the world. Deploying your quiz makes it accessible to anyone with an internet connection. Here’s a straightforward approach to get your quiz online.
Choose a Hosting Platform
For simple projects, platforms like GitHub Pages are ideal. They’re free and easy to use for hosting static websites, which includes HTML, CSS, and JavaScript projects.
Set Up Your Project on GitHub
- First, ensure your quiz code is in a GitHub repository.
- Navigate to your repository settings and find the “Pages” section.
- Select the branch you want to deploy (usually main or master) and click “Save.”
GitHub will provide you with a URL where your quiz is hosted. It’s that simple!
Test Your Live Quiz
Before making your quiz public to the world, test the live version. Ensure everything works as expected, just like on your local machine.
Consider Domain Name
If you want a more professional or memorable URL, consider purchasing a domain name and linking it to your GitHub Page. Many services offer affordable options.
SEO and Analytics
- Add relevant <meta> tags to your HTML to improve your quiz’s SEO.
- Consider integrating Google Analytics to track user engagement and gain insights into how your quiz is used.
Promote Your Quiz
- Share your quiz on social media, forums, or any platform where potential users might be interested.
- Getting feedback from early users can provide valuable insights for improvements.
FAQs
How do I start making a quiz in HTML, CSS, and JavaScript?
Begin by structuring your quiz with HTML for the layout, styling it with CSS for visual appeal, and adding interactivity and logic using JavaScript for dynamic question generation and scoring.
Can I make a responsive quiz design using CSS?
Yes, utilize CSS media queries to ensure your quiz application is responsive, providing an optimal user experience across various device sizes and screen resolutions.
What are some best practices for JavaScript quiz logic?
Use arrays to store questions and answers, functions to update the quiz content, and event listeners for user interactions. Implement feedback mechanisms for correct or incorrect answers to enhance learning.
How can I test and debug my quiz application?
Employ console logs, browser developer tools, and JavaScript testing frameworks like Jest or Mocha. Test across different browsers and devices to ensure compatibility and responsiveness.
What’s the simplest way to deploy a quiz made with HTML, CSS, and JavaScript?
GitHub Pages offers a straightforward platform for deploying static web applications, including quiz applications, making your project accessible via a unique URL.
Conclusion
Crafting a quiz application with HTML, CSS, and JavaScript is indeed a journey that marries creativity with technical prowess. Initially, structuring your quiz in HTML lays the foundational bricks. Subsequently, styling with CSS enhances its visual appeal, and finally, JavaScript breathes life into it, injecting layers of engagement and interactivity.
Moreover, incorporating advanced features, alongside rigorous testing and meticulous deployment, further polishes the experience, ensuring it’s not only accessible but also delightful for a diverse audience. This guide arms you with the essential knowledge to forge your quiz, urging you to push boundaries and innovate. Always remember, the most impactful quizzes not only challenge and educate but also entertain. Hence, now marks your moment to craft something truly extraordinary.

Hi, I’m Geoff. I design. I develop. I do lots of things in between. What that really boils down to is that I make websites.
